
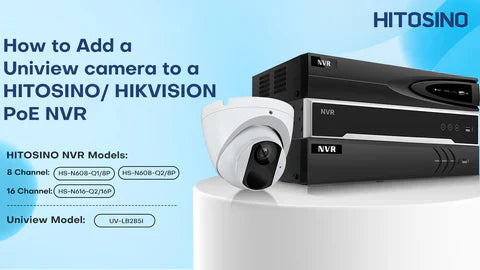

In previous articles, we have discussed how to connect Dahua, Amcrest, and Reolink cameras to our HITOSINO/Hikvision PoE NVRs. Today, we will show you how to add a Uniview camera to a Hikvision/HITOSINO PoE NVR using ONVIF, continuing our series on seamless integration.
Simply Understanding the ONVIF Protocol
ONVIF (Open Network Video Interface Forum) is a collaborative platform designed to unify standards for IP security systems. This fosters compatibility across a range of brands, making it simpler to integrate diverse security technologies. Learn more about ONVIF.
Preparation
Before connecting your Uniview camera to the HITOSINO/Hikvision PoE NVR using ONVIF, please ensure:
- Reset Camera: Reset your Uniview camera to factory settings.
- Install EZTOOLs 3.0: Ensure the EZTools 3.0 is installed on your computer.
- Prepare NVR credentials: Have the username and password for your HITOSINO NVR ready.
Connection method
To set up your Uniview camera on your computer, slightly modify the system connection by switching the network cable from the NVR’s LAN port to a PoE port.
Regular Connection:

Adjusted Connection: change the cable from the NVR’s LAN port to one of its PoE ports.

This setup ensures that the camera, computer, and router are all on the same Local Area Network (LAN), allowing for direct access to the camera from your computer.
Now, let's start setting up your system step by step.
Setup Guide
Step 1. Configure the IP Address of Your Uniview PoE Camera
To ensure a smooth setup, it's essential that your camera's IP address is on the same local network segment as the PoE NVR's built-in IP address. This facilitates seamless integration and efficient data transfer between the devices. Please proceed with the following steps, keeping this in mind.
1. Open EZTools 3.0 on your computer, and then you can see your camera on the list.


Note: If your Uniview camera doesn't appear in the software list, please ensure the camera is successfully powered on and properly connected to your NVR and network.
2. Modify the Uniview camera’s address:
①Check the box of the Uniview camera and then click Modify Network Parameters.

②Enter valid addresses and your password in the marked areas, and then click OK.

To ensure smooth communication between your NVR and a third-party camera like a Uniview camera, it's crucial to have the camera's IP address on the same network segment as the PoE NVR. For HITOSINO or HIKVISION PoE NVRs, the default IP address is 192.168.254.x. Additionally, make sure the gateway and subnet mask are correctly configured. Here's how to set up your camera:
- New IP: 192.168.254.x (x = 2 to 254, ensure no conflicts with other network devices)
- Subnet Mask: 255.255.255.0
- Gateway: 192.168.254.1 (The fourth digit must be 1)
If you need more detailed IP address modification videos, check out our tutorial on YouTube.
“Modification succeeded” indicates the IP address has been successfully modified. Then click Close.

Click on search to refresh the list so that you could see the modified IP address.

The following steps will be performed on your security system monitor.
Step 2. Add Uniview Camera to HITOSINO/HIKVISION PoE NVR
1. Unbind PoE Port: Go to Configuration> Camera> PoE Bingding Configuration to uncheck the channel occupied by Uniview camera, then click Apply.

2. Add Uniview camera: Go to IP Channel, and select the Uniview camera from the Online Device List. Refresh if it doesn't appear.

3. Edit the Uniview camera’s settings: Click Edit on the Uniview camera from the Added Device List, input the password, and click OK.

The green tick signifies your camera has been successfully added.

After successfully adding the Uniview camera, remember to revert to your regular connection.
Sum Up
We have written three articles about how to connect third-party cameras to Hikvision/HITOSINO PoE NVRs using ONVIF. From these articles, you can see that by following the right steps, the setup is not as difficult as it seems. Here’s a brief recap:
- Enable ONVIF: Ensure that ONVIF is enabled on your camera. For some brands, ONVIF is enabled by default. However, for brands like Hikvision, ONVIF needs to be enabled before proceeding with the setup.
- Change the IP Address: This has been emphasized in each article. Always modify the IP address to be on the same network segment as the built-in IP address of the PoE NVR to ensure proper communication and data transfer.
- Add the Camera to Your PoE NVR: Use the NVR’s interface to add the third-party camera, ensuring all settings are correctly configured.
By following these steps, you can overcome common integration challenges and enhance your surveillance system. Stay tuned for our upcoming article, where we will delve deeper into the principles of ONVIF setup. For more tips and detailed guides, visit our FAQ and support center.
Additional Resources:
Video Tutorials
Operational Guides
- How to add a Reolink camera to a HITOSINO/HIKVISION PoE NVR
- How to add an Amcrest camera to a HITOSINO/HIKVISION PoE NVR
- How to add a Dahua/Valucam camera to a HITOSINO/HIKVISION PoE NVR
Compatible product models are listed in the table below.
| ASIN | HITOSINO NVR | Hikvision Model Number | Compatible Products for Frontend/Backend |
| B0CKYZ1TFQ | NVR-N608-Q1/8P-2TB | DS-7608NI-Q1/8P | All Uniview Cameras, our Video Camera Model: UV-LB285I |
| B0CJWWFZGB | NVR-N608-Q1/8P-2TB | DS-7608NI-Q1/8P | All Uniview Cameras, our Video Camera Model: UV-LB285I |
| B0CYCB4YJM | NVR-NI616-K2/16P | DS-7616NXI-K2/16P | All Uniview Cameras, our Video Camera Model: UV-LB285I |
| B0C5MHXQCY | NVR-N608-Q1/8P-2TB | DS-7608NI-Q1/8P | All Uniview Cameras, our Video Camera Model: UV-LB285I |
| B0B5ZW164L | NVR-N608-Q1/8P-2TB | DS-7608NI-Q1/8P | All Uniview Cameras, our Video Camera Model: UV-LB285I |
| B0B8VMVBQT | NVR-N608-Q1/8P-2TB | DS-7608NI-Q1/8P | All Uniview Cameras, our Video Camera Model: UV-LB285I |
| B0CYSM3KCD | NVR-NI632-K2/16P | DS-7632NXI-K2/16P | All Uniview Cameras, our Video Camera Model: UV-LB285I |
| B0B8VPDFJZ | NVR-N608-Q1/8P-2TB | DS-7608NI-Q1/8P | All Uniview Cameras, our Video Camera Model: UV-LB285I |
| B0BPXTCHX2 | NVR-N608-Q1/8P | DS-7608NI-Q1/8P | All Uniview Cameras, our Video Camera Model: UV-LB285I |
| B0D266YZ4F | NVR-N608-Q1/8P-2TB | DS-7608NI-Q1/8P | All Uniview Cameras, our Video Camera Model: UV-LB285I |
| B0CC9CCTFZ | NVR-N616-Q2/16P-N | DS-7616NI-Q2/16P | All Uniview Cameras, our Video Camera Model: UV-LB285I |
| B0CR9VGLDQ | NVR-N608-Q1/8P-2TB-2N | DS-7608NI-Q1/8P | All Uniview Cameras, our Video Camera Model: UV-LB285I |
| B0CWNRK6N7 | NVR-N608-Q2/8P-N | DS-7608NI-Q2/8P | All Uniview Cameras, our Video Camera Model: UV-LB285I |
The connection is the same for all Uniview cameras and HITOSINO/Hikvision PoE NVRs. However, it is always recommended to use the same brand for cameras and NVRs within a single system to ensure that all functions work properly.